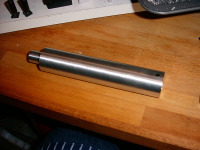
Threading Handle Extension
|
|
This is my implementation of
Sherline Tip #12, by Marcus
Carius. It allows the Threading Attachment to be used without removing the
motor.
|
|
|
|
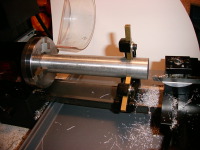
Face End
I started off with a 6" piece of aluminum that happened to be about 1-1/8"
in diameter. Using the fixed steady rest, I faced off one end and center
drilled it.
Bigger...
|
|
|
|
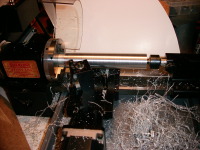
Turn Shaft
I then turned a small amount from the diameter. This particular operation
is purely cosmetic and could be skipped.
Bigger...
|
|
|
|
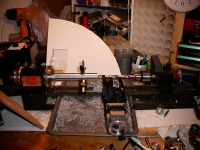
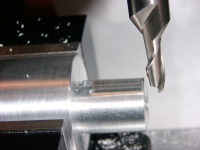
Drill Hole
I then proceeded to drill out a 1/2" diameter hole in the end (I step
drilled the hole using the following sizes: 1/8", 1/4", 3/8", 7/16", 1/2").
With the 6" piece, the 1/2" drill bit, and the 1/2" drill chuck, there was only
3" of space left at the end of my 24" bed. The hole was drilled about 1"
deep (the tip of the drill went in 1"). With the 1/2" drill bit, the outside
of the drill bit went in about 0.85". It only needs to be about 0.75" deep.
Bigger...
|
|
|
|
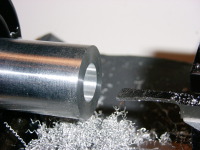
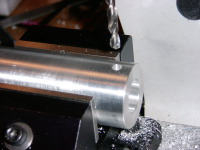
Bore Hole
The 1/2" hole was then bored out to around 0.562", which is the outside
diameter of the spindle shaft.
Bigger...
|
|
|
|
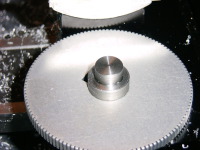
Measure Fit
I realized that the gears included with the threading attachment have an
inside diameter which matches the spindle shaft. The 127 tooth gear also
has a very short shaft attached to it which has the same diameter. I used
this short piece of shaft to check the fit of the bore, before removing the
3 jaw chuck (with the aluminum shaft still chucked up) to double check the
fit on the real shaft.
Bigger...
|
|
|
|
Add Relief
The extender shaft was then reversed end for end, faced, and center drilled.
I decided to make the end portion of the shaft 0.680" long, and used the
parting tool to reduce the diameter to 0.540". This would allow a 0.010"
relief at the shoulder.
Bigger...
|
|
|
|
Remove Excess
I then removed the excess material to bring the diameter down to 0.560". Here
you can see a 0.050" cut being made.
Bigger...
|
|
|
|
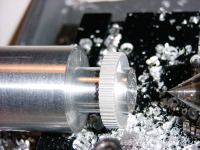
Measure Fit
I used one of the small gears that came with the threading attachment to
check the diameter for fit, before trying the handle which came with the
threading attachment (the gear was snug fit on the spindle shaft).
Bigger...
|
|
|
|
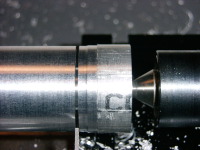
Add Flat
The extender shaft was then mounted in the vise, and a flat was added for
the setscrew in the handle to seat against. I removed about 0.015" to make
the flat.
Bigger...
|
|
|
|
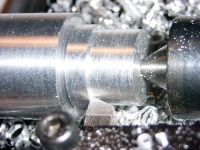
Drill Pilot for setscrew
The extender shaft was then swapped end for end in the vise, and a pilot hole
for the 10-32 setscrew was drilled in the center of the shaft, 0.250" back
from the edge.
Bigger...
|
|
|
|
Add clearance for screw
A small clearance needs to be made for the head of the screw on the spindle
shaft. I used a 3/16" (0.1875") end mill, and moved the Y axis 0.011"
either side of center to make the clearance around 0.210". The head of the
screw is about 0.2" in diameter. I decided that having the clearance angled
a bit wouldn't change the functionality and chose to make the clearance
like this rather than setting the mill up as a horizontal mill.
Bigger...
|
|
|
|
|
|
|
|
|
|
|
Home
- Machinist
- Modifications/Improvements
|