Grinder Wheel
|
|
I bought a "better" Norton Grinding wheel for my grinder. When I tried to
mount the grinding wheel, it ran with a distinct wobble. This describes
what I did to try and correct it.
|
|
|
|
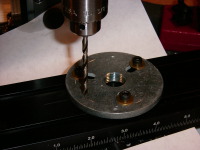
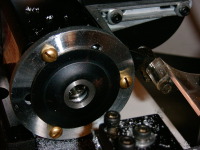
Drill Mounting Holes
I decided to mount the arbor washers on the faceplate. I couldn't use the
slots that were already on the faceplate (they weren't quite big enough),
so I needed to drill some new holes. I scored a line at the correct diameter
with the faceplate mounted on the headstock and eyeballed half-way between
the slots.
Bigger...
|
|
|
|
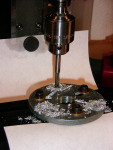
Tap Mounting Holes.
As each hole was drilled, I tapped it using a 10-32 tap. I made the taper
have a light fit with the draw bolt removed, and turned the drill chuck by
hand. As the tap drew itself into the faceplate, it could wobble a little
bit, but it stayed more or less square. The faceplate is fairly thin and
of a soft material, so this could have been done fairly easily by hand as
well.
Bigger...
|
|
|
|
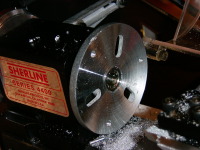
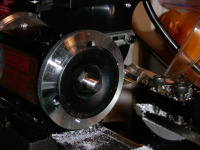
Face the faceplate.
In order to make sure that facing operation which was to be performed on the
arbor washers was perpendicular to the axis of rotation, you need to ensure
that the faceplate itself is perpendicular to the axis of rotation. Here
you can see the faceplate after it was faced.
Bigger...
|
|
|
|
|
|
|
|
|
|
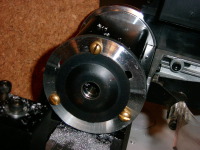
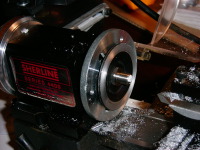
Mount the other side
Now that one side of the washer is true, mounting it to the faceplate will
allow the second side to be made parallel. It turned out that the #1 Morse
Taper used to mount the drill chuck fit nicely through the center and I was
able to clamp the washer down using the draw bolt.
Bigger...
|
|
|
|
|
|
|
|
|
|
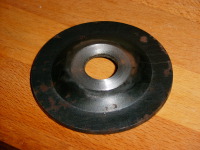
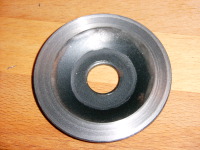
Finished Side 2
This is the other side of the arbor washer. In retrospect, truing the
washers didn't seem to have much improvement on side-to-side wobble of the
grinding wheel. I was able to rotate the wheel & washers a slight amount
and eventually found a position which minimized the side-to-side wobble.
Bigger...
|
|
|
|
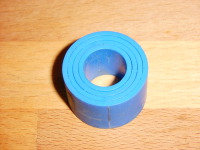
Plastic Inserts
The diameter of the hole in the center of the grinding wheel was 1", and the
shaft on the grinding wheel is 1/2". These are the plastic inserts that came
with the grinding wheel to adapt to the difference. Once the side to side
wobble was eliminated, there was still a fair amount of wobble casued by the
grinding wheel center not coinciding with the center of the shaft. This was
caused in large part by the slop in the plastic inserts.
Bigger...
|
|
|
|
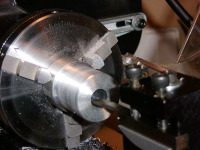
Boring Aluminum Insert
I decided to create an aluminum insert to eliminate the slop. First the
outside of a piece of aluminum was turned so that it fit nicely in the
center of the grinding wheel. Here the center portion is being bored to
match the diameter of the shaft.
Bigger...
|
|
|
|
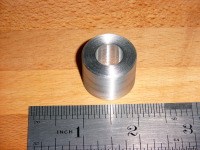
Finished Aluminum Insert
This is the finished aluminum insert. The grinding wheel now runs fairly true
side-to-side and concentric with the shaft. I'll perform a final truing
operation using a single point diamond dresser.
Bigger...
|
|
Home
- Machinist
- Modifications/Improvements
|