Making Pens
|
|
Here are the basic steps required to make pens on your lathe.
I made a basic list of pen making supplies that you'll need to get started.
|
|
|
|
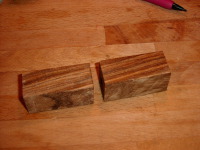
Mark Grain
Before cutting the pen blank, I like to put a pencil mark across the cut.
This allows the grain to be matched up again in case you drop the pen blanks.
If I'm doing several pen blanks from the same type of wood, then I'll also
letter or number the pairs.
Bigger...
|
|
|
|
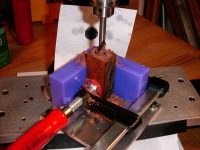
Drill Center Hole
Using a 7mm brad point drill, drill a hole through the center of the blank.
The brad point drill reduces tear out when it breaks through the bottom.
Some pictures of the pen drilling jig are here.
Bigger...
|
|
|
|
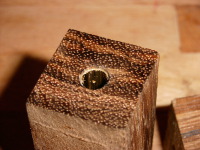
Epoxy Brass Tubes
Epoxy the brass tubes into the blanks. The brass should be in just slightly
from the end of the pen blank.
Bigger...
|
|
|
|
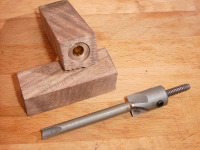
Square up the ends of the pen blanks
Use a pen mill to square up the ends with the brass tubing and bring the
wood flush with the end of the brass tubing. I like to just touch the brass
and take a very fine layer off (makes the brass shiny). Once I've done this
I put marks on the insides of the tubes (using a permanent marker) to
indicate how the grain lines up. One you've turned the pens, your original
pencil mark will be gone.
Bigger...
|
|
|
|
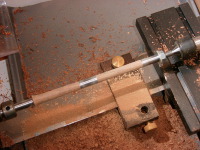
Mount Blanks
The blanks are then mounted in the pen mandrel. There are bushings on either
side of each pen blank, and the diameter of the bushing is the "desired"
diameter to ensure a good fit with the hardware. The wood chips seem to fly
much further than the metal chips, so I use pieces of cardboard to help
contain them. The wood turning rest was adapted from a Lee Valley tool rest
for the Taig lathe. You can see how I did that
here.
Bigger...
|
|
|
|
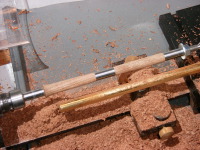
Turn to Size
The fun part is turning the blanks to size. It generates lots of sawdust
as can be seen here. For this particular pen, I used a simple design
with a flute at the end.
Bigger...
|
|
|
|
Sand Smooth
Next, the pen body is sanded using 120, 240, and 400 grit sand paper. I use
aluminum oxide on a flexible cloth backing, which is really nice for turning.
After sanding, the wood is burnished using some sawdust (not the stuff from
sanding, but rather the sawdust from turning). Grab a bunch between
your fingers and press against the turning wood. This fills in small
depressions in the wood, and actually put a bit of shine on the wood. Follow
with a a few coats of turners polish. Once the polish has dried, a coat
of turner's wax followed by a burnish finishes the pen body.
Bigger...
|
|
|
|
|
|
|
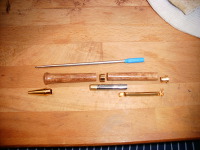
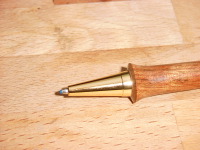
Approximate Depth
After pressing the tip on, I like to check to see how far the twist mechanism
needs to be pressed in. When properly assembled, a small portion of the
straight section of the tip should protrude beyond the tip. Here we can
see that the right side of the brass needs to go just inside the end of
the body.
Bigger...
|
|
|
|
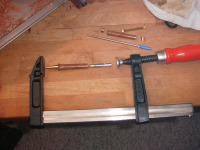
Press Pieces Together
You can use a vise, or a clamp to press the pieces together. Everything
is a press fit, so don't push them too far, since they're impossible
to take apart without proper disassembly tools.
Bigger...
|
|
|
|
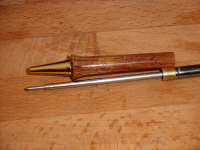
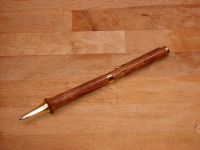
Check Depth
This is about how far the tip should protrude. The blue stuff at the tip
of the pen is some type of coating which needs to be scraped off before
using the pen.
Bigger...
|
|
|
|
|
Home
- Wood Working
|