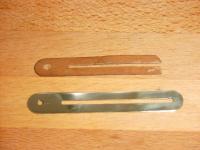
Box Stay
|
|
This was another project for my wife, Louise. Louise picked up an "antique"
wooden box, which had a broken box stay. The box stay is what keeps the lid
from opening too far. You can pick these up for about 38 cents, but I was
looking forward to the challenge of making one.
I also came up with what I think is a nifty technique for aligning the
rotary table.
|
|
|
|
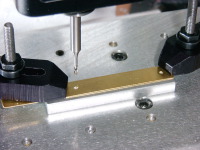
Drill Holes
I drilled the holes, one at each end of the slot, and one at the end
(underneath the clamp on the left). I used an end mill and plunged the holes
since I was going to mill the slot anyways.
Bigger...
|
|
|
|
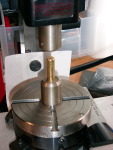
Align Rotary Table
I needed to align the rotary table to the spindle, and I found this method is
much quicker, and fairly accurate, although probably not quite as accurate
as inidcating. I put the chuck adapter in the center of the rotary table
and put a 3/8" end mill holder on the chuck adpater. I put another 3/8"
end mill holder on the spindle, and put a 3/8" piece of brass in the
bottom end mill holder. I had to sand the brass rod a bit in order to get
it to just fit in the end mill holder. The hold downs for the rotary table
were in place, but loose. I then moved the XY table to get the upper end
mill lined up with the brass rod.
Bigger...
|
|
|
|
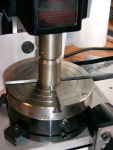
Align Rotary Table2
I lowered the spindle onto the brass rod. This lines up the rotary table
with the spindle. The rotary table hold downs can now be tightened, and
the zero adjustable hand wheels zeroed.
Bigger...
|
|
|
|
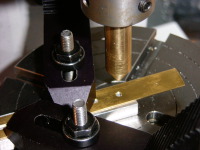
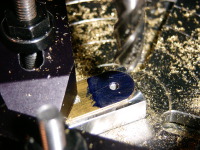
Align Workpiece
Now that the rotary table is lined up with the spindle, the workpiece needs
to be lined up as well. I put a taper on the end of the brass rod and used
that to center the hole in the workpiece with the spindle. There was a small
hole in the scrap underneath to allow clearance for the brass piece.
The work piece also needs to be well clamped.
Bigger...
|
|
|
|
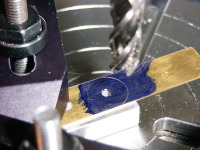
Check Work Piece Alignment
I put some layout blue on the brass, and moved the Y axis by half of the
width of the brass piece. I lowered the brass pointed piece and rotated the
table 180 degrees. The line left by the point will become the outline of
end. The brass point is replaced by an end mill and the Y axis is offset
by 1/2 the width of the end mill.
Bigger...
|
|
|
|
|
|
|
|
|
|
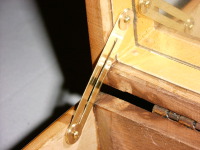
Installed Stay
This is what the stay looks like when it's installed in the box. I created
4 washers as well, which can be seen in this picture.
Bigger...
|
|
Home
- Machinist
- Projects
|