High Tech Systems LLC Tooling Plate
|
|
I bought a Tooling Plate from
High Tech Systems LLC.
I didn't like how far back the tooling plate extends with the default
mounting (thus limiting the Y axis movement). I also didn't like the
fact that the rotary table mounted near the front instead of the rear.
|
|
|
|
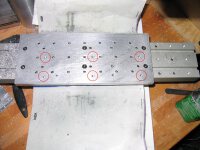
Mounting Holes
Since I already have a pretty much permanent tooling plate already on the
table, I just went and drilled some mounting holes in the existing tooling
plate. I circled them in red to make them easier to spot.
Bigger...
|
|
|
|
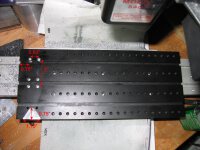
Modified Tooling Plate
Here's a photo of the modified tooling plate. I put a new set of holes
for mounting the rotary table. The holes are 2" apart, and 0.63" in the
short direction. The left holes are 0.75" from the left edge of the table.
The notch is 1.15" wide, 0.75" from the edge and 0.16" deep. I used a 0.5"
endmill to machine the notch. The notch is required to allow the stepper
motor mount to not touch the tooling plate.
In order to keep the holes straight (not slipping sideways into the T-slot)
I drilled a 1/8" pilot hole before drilling the 10-32 clearance hole.
Bigger...
|
|
|
|
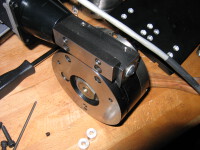
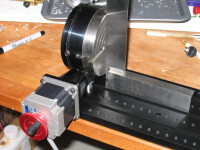
Rotary Table
To mount the rotary table, I found it easy to rest the top part on
something of an appropriate height. Remomve the 2 screws holding the
mounting tab to the body. I moved two of the set screws from the four
on one edge to fill the two holes left.
Bigger...
|
|
|
|
|
|
|
|
|
|
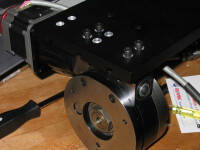
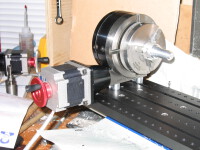
Square it up
I found that the rotary table wasn't quite square to the tooling plate, but
that I could make it square by controlling the tightness of the mounting
screws.
Bigger...
|
|
|
|
|
Home
- Machinist
- Modifications/Improvements
|